
Have you ever lost important files on your Mac? Are you worried this will happen again? Look no further, we have the solution for you: Time Machine. This is Apple's simple and practical tool for backing up your data.
Indeed, the latter will allow you to make backups and thus avoid bad experiences where you lose everything you had saved. To help you understand everything about it, we suggest you see in this article how to use it effectively!
So, let's not waste a moment and see together how to make backups quickly and in a completely secure manner on your Mac device using this feature time Machine !
How do I select where to use Time Machine?

Because yes, unlike a Cloud which only allows you to save certain data, Time Machine allows you to make a complete backup of your Mac if you wish!
In fact, you will not only be able to use it for files, but also for your music tracks, your emails, or even your applications. So this is a very useful feature.
To get it started, you will simply need to make sure tohave an external device such as a USB key or even a external hard drive where you will store the backup.
You have been warned!: Apple gives you important recommendations regarding the use of an external device.
- To ensure the security and integrity of your files, ensure that only Time Machine backups are present on this key. If other files are stored there, transfer them to another device before starting the procedure.
- Concerning the available space, it is recommended that it be at least twice as high to the size of the backup to prevent any problems.
Steps to Backup with Time Machine on Your Mac
Now that you have recovered an external storage device and made sure everything is good, you will be able to start the backup procedure by opening Time Machine on your computer.
To do this, do as shown below:
- Connect your external storage device to your Mac.
- When you first connect your external device, your Mac may automatically offer to use this device for Time Machine. If so, click Use as backup disk and go straight to step 6.
- If your Mac doesn't automatically offer this option, click the Apple menu at the top left of your screen.
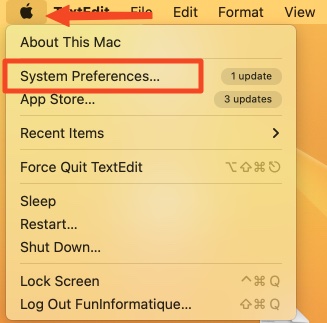
- Select System Preferences then click time Machine.
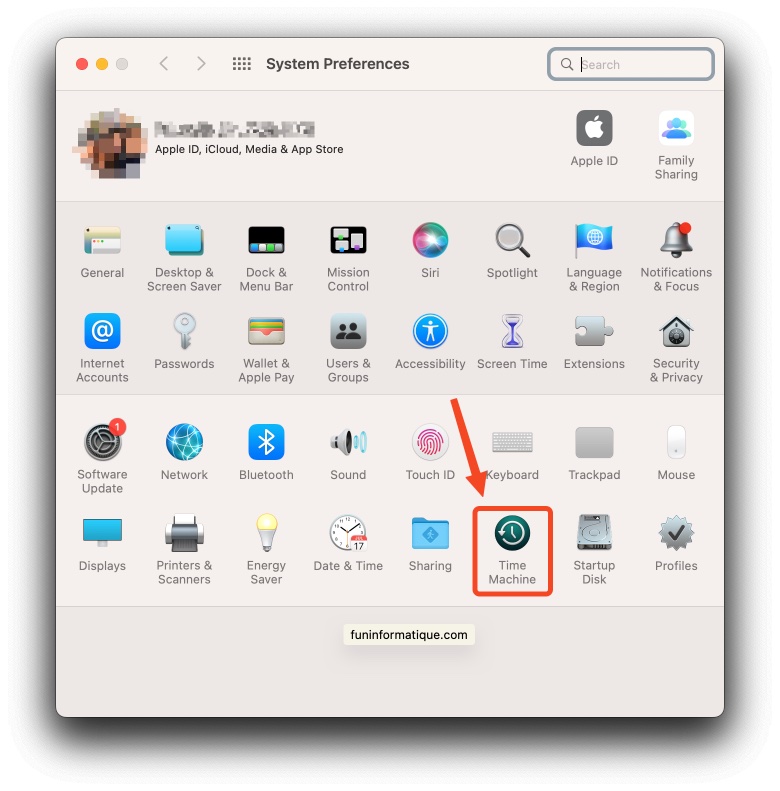
- In the Time Machine interface, click Select the backup disk.

- Then choose your external device from the list and click Use this disc.
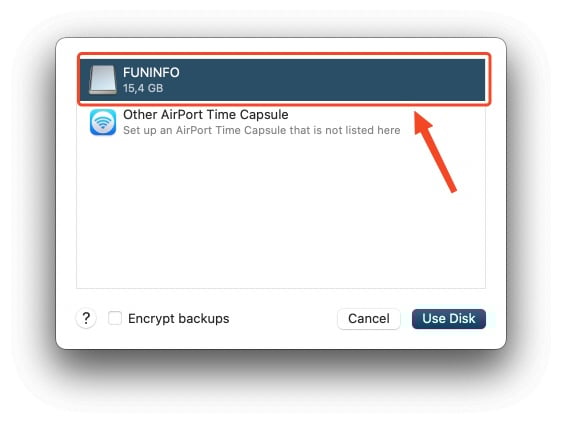
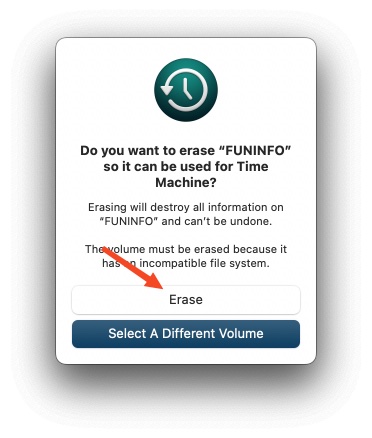
- If this is your first time using this device with Time Machine, your Mac may ask you if you want to erase the device or use it as is. Make sure to back up any important content from the device before confirming.
- The backup will begin automatically once your choice is made. Verify that the backup is completed correctly by observing the progress in the Time Machine icon in the menu bar.
- Finally, safely disconnect your external storage device once the backup is complete.
How to adjust the frequency of backups?
Basically, Time Machine performs automatic backups at regular intervals. To find out when the next backup is:
- Open the menu, as explained previously.
- If a backup is in progress while you are using your Mac, a Time Machine logo will appear in the taskbar. By clicking on it, you can view the backup progress.
In addition to automatic backups, Time Machine offers the ability to perform manual backups. This is especially useful if you have important files that you don't want to lose.
- To initiate a manual backup, go to the application menu or click on the Time Machine logo in the taskbar and choose the appropriate option.
Just like automatic backups, you can monitor progress from the taskbar. If you want to adjust the frequency of backups:
Go to Time Machine Options and look for the “ Backup frequency » to make the necessary changes.
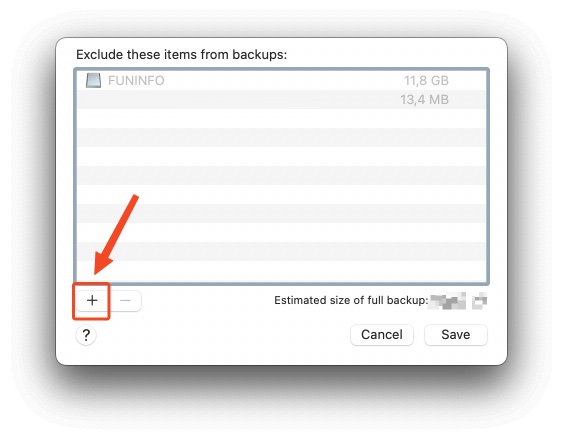
Is it possible to choose folders backed up via Time Machine?
One of the questions you're probably asking yourself is whether it's mandatory to back up your entire Mac with Time Machine, and the answer is no! You can exclude certain items from backups.
To do this, go to the settings, then click on Options and the “ +“. There you will have the option to exclude items from your backups. Of course, all this is not final. By then clicking on the “-“ button, you can reinstate them.
Conclusion
There you go, you now know everything you need to know about Time Machine, a very practical feature of your Mac that will save you a lot of worries about data loss in the future.
Moreover, know that in addition to storing data, this tool also allows you to go back to previous versions that you have saved. Useful if you are the victim of a bug or if you deleted a file by mistake and a backup has since taken place!
