
Does managing your emails on Mac sometimes seem complicated? Do you ever lose important messages in the constant flow of emails? Do not panic ! Mac designers anticipated these challenges and created effective solutions for you.
In this article, we reveal how configure multiple mailboxes on your Mac. Why is this a good idea? How can this organization help you stay on top of your email flow?
Follow our simple and clear steps to achieve this easily.
Please note, mailboxes on Mac are not email addresses!
First, it is essential to understand that Mailboxes on Mac are not email addresses. This distinction is fundamental before proceeding further.
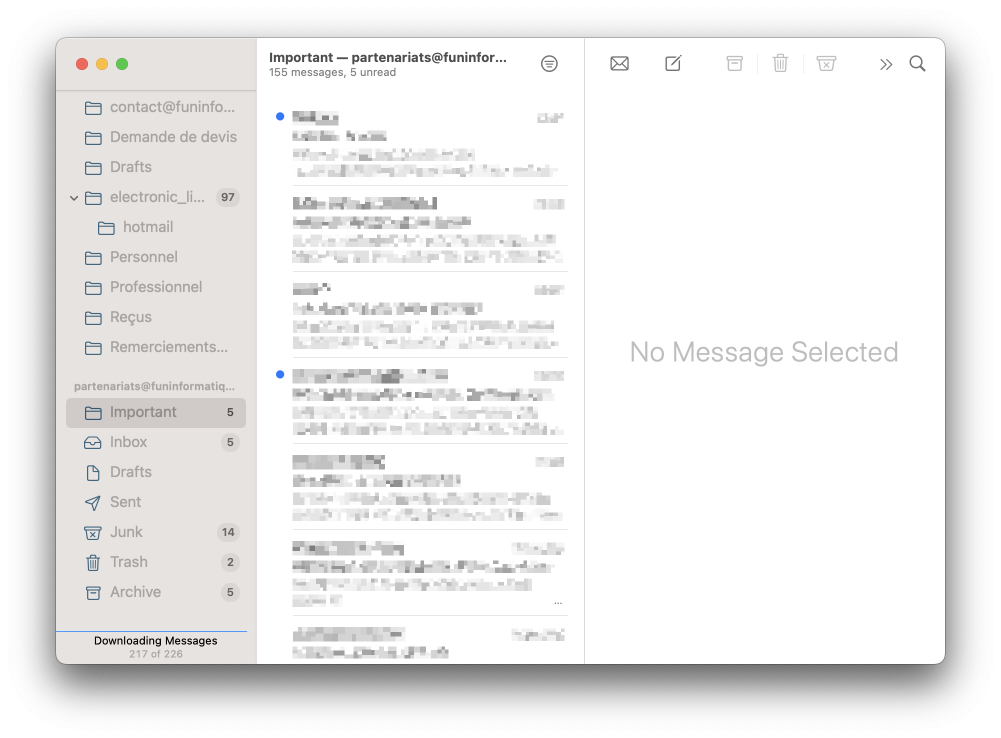
Next, it's worth pointing out that mailboxes act as sorting or classification folders within your Mail application, not as separate email addresses. Think of it as organized buckets within a single email address.
Furthermore, it is important to note that managing multiple email addresses on a single Mac is completely doable. Let's imagine that you have a professional address and another personal one. You can configure and use them independently on the same device.
To do this, here are the steps to follow:
- Launch the Mail app on your Mac.
- If you don't already have an email account set up, the app should display a welcome screen prompting you to add an account.
- Choose the type of email account to add (such as Gmail, Yahoo, Outlook, etc.).
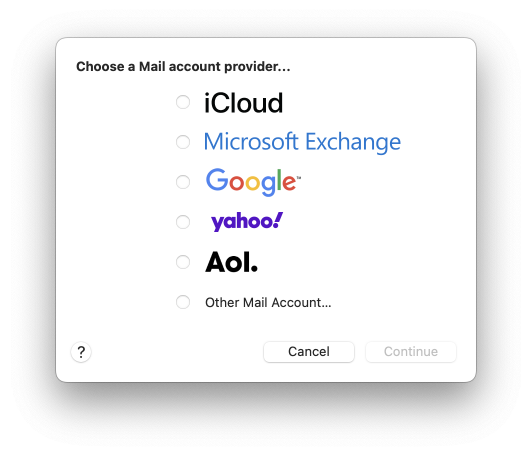
- Enter the required information for your account, including your email address and password. You may also need to provide additional information like username and email server details.
- After entering your information, wait for the Mail app to verify and configure your account. This may take a while.
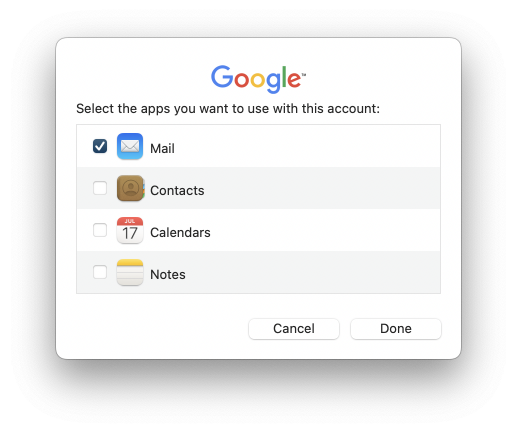
- Once verification is complete, configure your account options such as email synchronization, contacts and calendars.
- Follow the final instructions to finish adding your account.
- To add another email address, click Add an account and repeat the steps above.
Why is it useful to have multiple email inboxes?

Now that the difference between mailboxes on Mac and email addresses is clarified, let's take an interest in these first ones and in particular why we should add them to our messaging.
Well the reason is simple, it will make your life easier. Today, we receive emails by the dozens, and some important ones risk quickly getting lost or even worse, being deleted either by mistake, or because you limit the number of emails in your inbox.
Therefore, as we pointed out to you in the introduction, these boxes will serve as sub-folders where you will be able to store important emails, classifying them yourself. This way, you will no longer have to search for hours for this file that we sent you in an email a few days ago and which you can no longer get your hands on.
How to organize messages in mailboxes on Mac?
For efficient management of your emails on Mac, the Mail application offers advanced sorting features.
Here are the steps to use these options and organize your messages:
- Configure automatic sorting rules : Create rules in Mail to automatically route emails to specific mailboxes, based on criteria such as sender or subject.
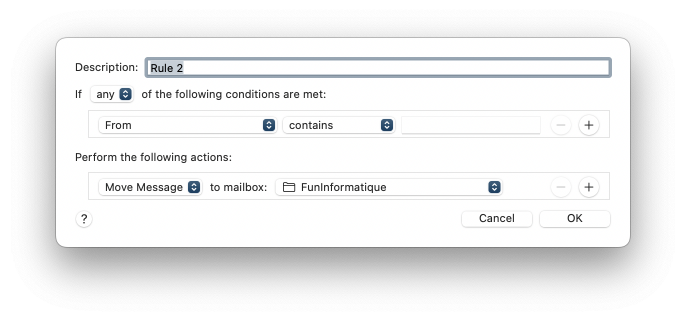
- Customization for multiple accounts : If you have several email boxes, configure separate rules for each.
- Manual sorting : You also have the possibility to manually sort your emails by moving them to the mailboxes of your choice.
How to create a mailbox on Mac?
Now that all of this has been covered, let's dive into the matter by looking at how to create mailboxes on Mac. The good news is that it is not only very quick, but also easy to do!
Here are the steps to create a mailbox on a Mac, presented in bullet form:
- First, start the Mail app on your Mac.
- Next, in the Mail app, look at the top of the screen to find the menu bar. Click on Letters box in this menu bar.
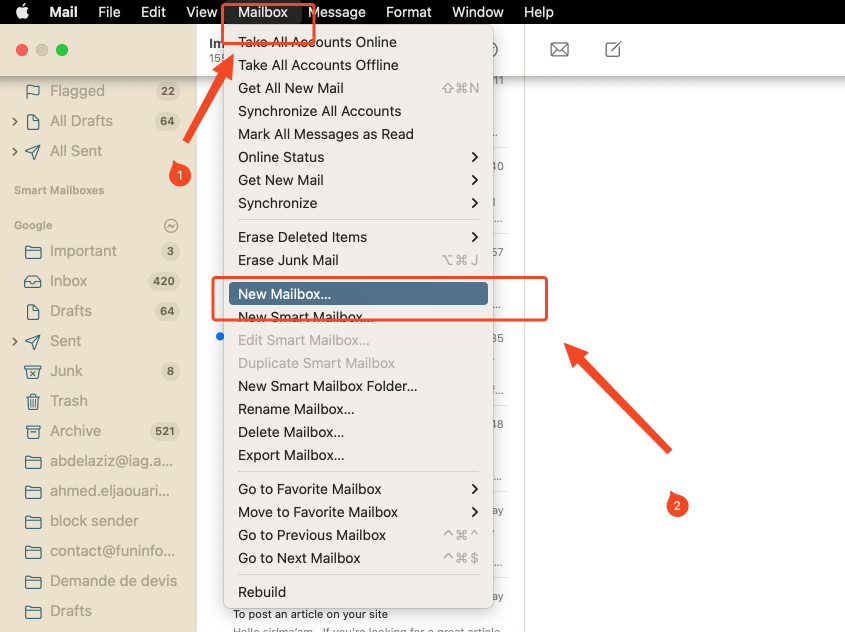
- Now, click on the option to create a new mailbox.
- Then choose the location of the mailbox:
- On my mac : If you choose this option, the mailbox will be accessible only on this specific Mac.
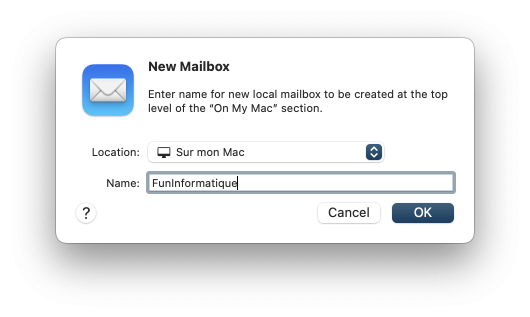
- On my account : By choosing this option, the mailbox will be accessible on all devices linked to this account. This is the recommended option for most users.
- On my mac : If you choose this option, the mailbox will be accessible only on this specific Mac.
- Give your new mailbox a name.
- Finally, follow the remaining instructions to complete the creation of your mailbox.
How do I delete boxes that are no longer useful?
Mailboxes on Mac can be useful temporarily, if you are organizing a trip for example and want to centralize emails. Except that at the end of the latter, you probably want to delete this box which no longer has any use.
Here again, the procedure is simple, although be careful it leads to the deletion of the box AND the emails inside it. So empty important messages before deleting it permanently. As for the procedure to follow, here it is:
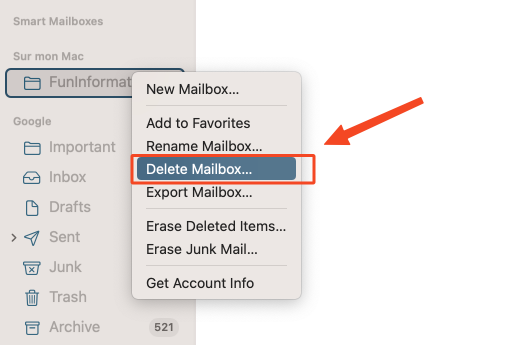
- Go to the Mail app.
- Click on the box to delete.
- Choose Letters boxthen Delete box.
That's it, you should now be knowledgeable about mailboxes on Mac, and as you have just seen once you know the procedure to follow, there is nothing rocket science in creating or deleting them.
In addition, these can prove to be very useful if you ever need to sort your emails easily and quickly, whether directly on your Mac or on all your devices connected to this mailbox!
