
Last updated: January 26, 2023
You often use live CDs to repair Windows, launch a Linux system or to test the security of a network? The problem is that you have to burn new CDs with each update and transport all these CDs without knowing if they will really be useful.
In this article, I will show you a trick that will allow you to create a USB drive with multiple ISOs. It is very useful in the case of mini laptops without DVD reader / writer, but also for all people who prefer to get rid of CDs and DVDs.
For those who do not know an ISO file is an image of a disc (CD, DVD) in file form, created with burning software, with the extension .ISO.
To create a Multiboot USB key for several systems, we must download the ISO files of the systems that we are going to put in the USB key, a USB key of approximately 8 GB, and a small software called: XBoot.
In my case, I'm going to place three ISO files that I use frequently on a USB stick, but know that it is possible to use others or use more!
The three ISOs that I will put on my USB key
- Kali Linux: It is a distribution bringing together all the tools necessary for security testing of an information system. This is the Linux distribution favored by hackers.
Download kali Linux ISO file
- AVG Rescue CD: If you are dealing with a PC so infected with malware that Windows refuses to launch, it's time for a deep clean with AVG Rescue CD. The latter will launch before Windows giving you free reign to take care of your computer.
Download AVG Rescue CD ISO
- Hiren's BootCD: It's hard to be more complete than this Live CD which includes more than 350 programs classified in different genres: antivirus, system file repair, partition management, system information, password change, encryption, etc.
Download Hiren's BootCD
How to create a Multiboot USB stick with XBoot?
Let's start with download and launch XBoot. If an error message appears, you will need to download and install the .NET Framework. If all goes well you should see the main interface.

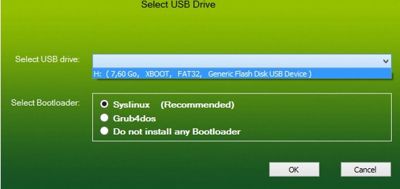
Once all your ISOs have been selected, simply plug in your blank USB drive and click “ Create USB“. Select your device from the menu and leave the bootloader as default. Then let the software do its thing.
Xboot will then ask you if you want to launch your creation virtually to see if everything is working fine.
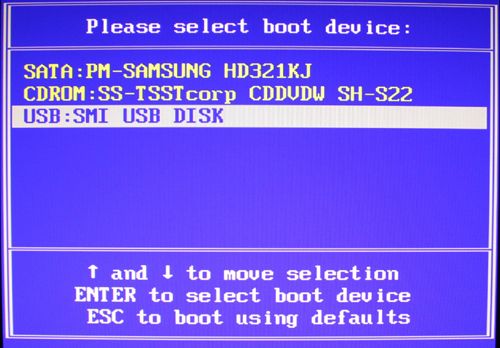
Once your key is ready, you just need to remember to boot from USB to be able to use it on a computer. Do Del, F1, F2 or F12 (depending on your motherboard model) just after turning on the PC and enter BIOS (Setup). Find the option Boot sequence and change the order to putting the USB port first.
If all goes well, you should see the following menu.
Boot from Hard Disk allows you to return to the system installed on the disk. The other lines correspond to the ISOs that you have integrated. Choose the ISO you want and hit enter.
Well done you have a multiboot USB stick with several systems and diagnostic / repair tools.